

A cocktail shaker is not only a symbolic tool for bartenders but also a key for many home bartending enthusiasts to achieve a “professional taste.” Whether it’s a classic Boston shaker, a three-piece shaker, or a French shaker, as long as you master the correct leak-proof techniques, temperature control techniques, and shaking details, you can make an ordinary drink more layered and professional in flavor.
This article will systematically explain the entire process of making a cocktail shaker, from preparation to shaking techniques, so that you can easily shake a bar-quality cocktail at home.

Why is the cocktail shaker the core of bartending?
A cocktail shaker is not just to “mix ingredients”; its core value is mainly reflected in three aspects:
1. Create a uniform blending effect
By shaking at a high frequency, the spirits, juices, syrups, and ice cubes are mixed into a uniform solution, resulting in a balanced and smooth taste.
2. Rapid cooling
The impact of ice cubes against the cup wall produces an extremely high cooling efficiency, which is unmatched by a mixing cup.
3. Provides a dense, foamy texture.
Egg whites, fruit puree, cream, and citrus ingredients create fine foam when shaken, giving the cocktail a fuller flavor.
This is why many professional bartenders emphasize the saying: “
If you can shake the glass properly, you’ve already won half the battle in making a successful cocktail.”
Common Types and Usage Differences of Cocktail Shakers
1. Boston Shaker
Composed of a metal cup and a glass cup, it is the most commonly used shaking glass by professional bartenders.
Good sealing
Large capacity
More flexible shaking method
Suitable for: citrus fruits, fruit juices, and wines containing protein.
2. Cobbler Shaker (3-piece cocktail shaker)
It consists of three parts: the cup body, the ice filter lid, and the top lid, and is most commonly used in households.
Built-in filter
Elegant
More suitable for beginners
Disadvantages: It is most prone to jamming, and it is also easy to leak if the shaking method is not correct.
3. French Shaker
The most beautiful wine shaker in appearance, with no filter and a two-piece design.
Smooth Design
Good sealing
It’s more elegant when you shake it.
Suitable for users who value a sense of ritual and aesthetic design.

Cocktail Shaker Leak Prevention Tips
Many people experience spills, spraying, or even ice flying out when using a swirling glass for the first time.
In fact, 99% of the problems are related to technique and the amount of liquid poured.
1. The liquid level should be controlled below 70%.
Overfilling is the main cause of leakage. Optimal
cocktail shaker filling volume:
Keep the liquid and ice level at 60%-70% of the cup’s capacity.
This allows for proper shaking without causing excessive pressure that could lead to a seal failure.
2. Use ice cubes instead of crushed ice.
Crushed ice melts quickly, increasing pressure and liquid volume, which can easily cause leaks.
Use large, intact blocks of ice whenever possible for better stability and cooling.
3. Boston shakers require “tilting and tapping the lock cup.”
Correct sealing method:
Metal cup covering glass
Slight misalignment
Tap the bevel with your palm.
A “snap” sound indicates a successful seal.
Incorrect methods (such as pressing too hard) can actually make leakage more likely.
4. For three-piece shaker cups, both sections of thread must be properly tightened.
A common mistake for beginners is only screwing it in halfway, causing it to open when shaken.
Tip: Tighten it completely and then back it out 1 mm to make the sealing ring pressure more stable.
5. Hold the cup at the seam, not at the top.
Holding the cup by the top can affect the seal by adjusting the force of your hand and the direction of shaking.
Correct procedure:
Boston shaker: Hold both ends of the seam with both hands.
Three-piece shaker: Hold the shaker body with one hand and hold the ice strainer lid with the other.
Cocktail Shaker Temperature Control Tips
Temperature affects flavor, and temperature control affects taste.
Many people shake the liquor for too long, which dilutes the flavor.
1. Why should we try to use large blocks of ice?
Large ice blocks melt slowly and have a small surface area.
Cools down quickly
low dilution
The flavor of the liquor is more concentrated when shaken.
Crushed ice will dilute the drink to a very watery consistency within 10 seconds.
2. Ideal shaking time: 10–15 seconds
Professional bartender experience:
Citrus fruits: Shake quickly for 10-12 seconds
Protein-based foods = 15-second hard shake
Creamy or thick fruit purees = approximately 18 seconds
Shaking for too long will result in:
Excessive ice melting
The wine becomes thinner
Loose texture
3. Judge temperature by sound
These are the bartender’s “experience and techniques”:
At first, the sound of ice hitting metal was loud.
When the sound deepens, the temperature has dropped to the appropriate level
and you can stop shaking it.
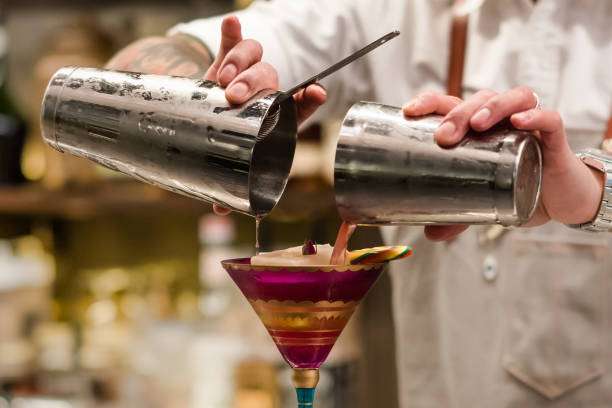
A Complete Guide to Shaking a Cocktail Shaker
1. Standard Shake
Suitable for most cocktails.
Key points of the action:
Hold the cup with both hands at both ends
Drive the forearm with the shoulder
Maintain a straight line and travel quickly back and forth.
Stable rhythm and light movements
A proper shake should produce a crisp, rhythmic sound, not a jerky motion of the elbow.
2. Hard Shake
Originating from Japanese cocktails, it is presented in three stages.
Features:
Building dense foam
To allow the liquid to collide more fully with the ice.
Perfect for yogurt drinks and protein cocktails like Whiskey Sour
The movement trajectory is “”S”-shaped, requiring a higher level of proficiency.
3. One-handed shaking method (Show Shake)
This is intended for performances or bar shows but is only recommended for experienced users.
It is not suitable for beginners, nor for three-piece shakers, as they are prone to leakage.
4. Horizontal tilt vs. vertical tilt
Horizontal shaking: rapid cooling and even mixing
Shake vertically: finer foam, smoother body.
Bartenders usually decide the direction of shaking based on the type of drink.
Cocktail Shaker Common Problems and Solutions
1. What to do if the three-piece shaker gets stuck?
The jamming is caused by a vacuum created after cooling.
Solution: Rinse the top with warm water to expand the metal, then gently tap the sides to break the vacuum.
2. Why can’t I open the Boston shaker?
To unlock, tap the area where the metal and glass meet with your palm in the opposite direction.
3. Will crushing the ice affect the taste?
Yes. The more ice cubes you break, the faster the dilution and the weaker the flavor of the alcohol.
4. Is pre-cooling necessary before shaking?
Professional practice: The cup can be pre-cooled, but the ice cubes taken from the refrigerator are more important.
Summarize
Mastering the use of a cocktail shaker doesn’t require complicated training.
As long as you understand the leak-proof principle, learn temperature control techniques, and are familiar with different shaking methods, anyone can mix professional-level cocktails at home. A cocktail shaker is a tool that becomes more intuitive and easier to use the more familiar you are, rather than something that’s more expensive or more magical.
Want to elevate the taste of your cocktails and the overall bartending experience? Check out our selection of professional-grade cocktail shakers to ensure every drink you make is packed with quality and flavor.